Showing posts with label Food. Show all posts

Monday, July 11, 2011

Happy Birthday

Happy Birthday to me!!!!!!!!

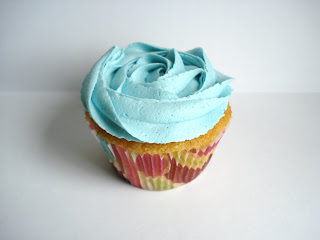
I whipped up a batch of cupcakes this morning and used my buttercream frosting recipe but used a combination of regular milk and lemon juice for the evaporated milk.  Not an overly lemon flavor, but just a himt to make it a little different.  Why, because it's my birthday and I can do whatever I want, that's why.  I love my birthday!

Abby was mad when she walked in the kitchen and asked what I was making and I said cupcakes.  She told me she should be making the cupcakes for me since it was my birthday.

Monday, June 27, 2011

Homemade Yogurt

I love homemade yogurt, especially when it's mixed with fresh fruit or homemade jam and topped with nuts or granola.  I am happy I decided to acutally post and not pretend like I can remember exactly how I did this for the next time I want to make yogurt.  Now, I can come straight to my blog and find it.

I made my best yogurt ever yesterday. I used greek plain yogurt instead of the regular plain yogurt which I have always used before.  I only used it because I really really wanted to make a new batch of homemade yogurt and it was the only kind that the store I was in that day had in a small container that wasn't flavored. I think it was Yoplait brand. I used 6 cups skim milk, 1/2 cup powdered milk, and the whole small container of yogurt. This time, there was no whey left floating on top; it all got absorbed into the yogurt. And the texture was very smooth and creamy like store bought yogurt, not grainy at all.


6 cups skim milk
1/2 cup powdered milk
6 oz plain greek yogurt (Yoplait)

Warm milk in microwave to 175 F. 2 min each time with about 1 min to 30 second break and stirred in between each cycle. Once the milk is warmed, stir in the powdered milk.  Cool milk to 105 F (I put min in the fridge to speed up the process). Add 1 cup of the warm milk to yogurt and gently stir until combined. Add 1 more cup of warm milk to yogurt and gently stir until combined. Pour milk/ yogurt mixture into the rest of the milk. Pour into 3 pint and 1 half pint jars with lids (or whatever combination will fit in your crock pot). Put the jars in the crock pot, fill with warm water to the rim of the pint jar. Alternate crock pot between warm and off for 6-8 hours. I think I did warm for hour then off for hour cycles, but not really regularly just whenever I happened to walk through the kitchen and think about it. 

Ideally, you want the water temperature to stay consistent between 100-110 F, so you can put your thermometer in the water and use it to help you know when to cycle the crock pot on and off.

Saturday, March 12, 2011

Brazilian Lemonade

I saw this recipe the other day and decided it would be a great afternoon treat for a warm sunny spring day like we are having today. Despite its name, it's actually made with limes not lemons.  I followed the exact recipe from Our Best Bites, but I will copy and paste it here for you.

Brazilian Lemonade
4 juicy limes (try and find ones with thin, smooth skins; they’re the juiciest and the thin skin cuts down on the chance of your drink being bitter)
1 c. sugar
6 c. cold water
6 Tbsp. sweetened condensed milk

Wash limes thoroughly with soap; you need the soap to get the wax and pesticides off of the limes because you’re using the WHOLE lime, baby. Cut the ends off the limes and then cut each lime into 8ths.  You might need to do this next part in 2 batches depending on the size of your blender.  Place the limes, water, and sugar in your blender, and pulse 5 times. Place a fine-mesh strainer over a pitcher (the one you’ll serve the lemonade in) and pour the blended mixture through the strainer and into the pitcher. Use a spoon to press the rest of the liquid into the pitcher. Add sweetened condensed milk and mix it in with a wisk. You may want to taste test it at this point.  If it’s bitter, just add some more sugar and maybe a little more sweetened condensed milk.

Serve immediately over lots of ice.  The longer you let it sit, the more bitter it will taste, so don't mix it up long before you plan to serve it.

The girls and I bought the ingredients this morning at the grocery store.  We went to the produce department where I asked Abby to find me 4 limes.  She is 6 years old and the girl didn't have a clue what a lime was.  So, I did what any good mother would do, I told her I wasn't going to help her find them, and asked her how she could figure out what one was.  I'm so mean.

We were standing right next to the very nice produce man so he overheard our entire conversation.  Finally, she got up the nerve to ask him what one looked like and he was very happy to help her.  He told her they were green  and shaped like a lemon, and then pointed her in the general direction.  Hello, that's what he's there for child!  They have been learning about community helpers at school and whether they provide goods or services, so I thought this was a great lesson for her to learn today.

And, just because this recipe lacks pictures, here are some limes in case someone else doesn't know what they are either.  Aren't they pretty?
To read the ingredients, it might sound kind of gross at first with the sweetened condensed milk and limes instead of lemons, but trust me, don't knock it until you've tried it.  At the store, Aly swore she was NOT drinking that nasty milk stuff in a can, yet when I held up a cup and yelled into the backyard "Girls come taste this!" she came willingly.  Abby got a small sip and said "yummy", Aly took a sip, snatched the cup away and took off running so she could have the whole thing to herself.

Monday, December 27, 2010

Slushy Syrup

Abby was very happy to get her very own Slushy Machine for Christmas.  She requested a blizzard maker, but since we already have 2 different types of ice cream churns, I'm glad her grandparents decided to go with this instead.  You can get one at Toys R Us. We tried it out on Christmas night and it did a great job of shaving the ice.  Much better than doing it in the blender like we have tried before. 


The syrup mix on the other hand was disgusting.  What a letdown for a kid that just made her first slushy.  We tried the orange flavor and it tasted slightly orangey and very chemically.  So, today, I made my own syrup using the recipe below, and we all had wonderful grape slushys for an afternoon snack.  Abby was a very happy little girl.

Slushy Syrup
1 cup water
1 packet unsweetened Kool Aid mix
1 3/4 cups sugar

Put everything in a small pot on the stovetop and heat on medium until the sugar is completely dissolved.  Allow it to cool.  We re-used a water bottle with a sports bottle top to store ours in and make it super easy to pour over our shaved ice.

Friday, October 29, 2010

Grape Salad

Ok, since I keep having requests for this recipe, I thought I would put it on my blog so you don't have to call, e-mail, or text me and then wait for me to find the recipe and then actually remember to send it to you.  Sorry, I don't have a picture to post with it right now.  And for anyone who hasn't eaten this whenI have made it, I only call it salad to make it sound healthy.  It is soooo yummy!

Grape Salad

Filling
2 lbs grapes (1 lb red & 1 lb green)
2- 8 oz pkgs cream cheese or neufchatel cheese

1 cup sour cream
1/2 to 1 cup sugar
1 tsp vanilla

Mix cream cheese, sour cream, sugar, and vanilla with mixer then stir in grapes with a spoon. Put in refrigerator.

Topping
1 cup pecans (can use more)
3/4 of a stick butter (use more if needed depending on how many pecans you use)
1/2 cup brown sugar

Melt butter, add brown sugar and nuts. Bake at 350 F for 15 - 20 minutes (do not overbake or it will be so hard it will break your teeth once it has cooled). Cool mixture a few minutes then sprinkle over grape mixture. Can be served right away, but I like to refrigerate mine until the topping gets hard first.

And just to be clear, I am not the original creator of this recipe.  It was given to me by Glenda Easley, a friend of my hubby's parents.  By far one of my favorite recipes I have ever recieved.

Tuesday, June 29, 2010

Freezing Corn on the Cob

First, get yourself a big 'ol bag of FRESH corn from the farmer's market or roadside stad. Grocery store corn is NOT acceptable to this farm raised girl. I would rather not eat corn at all than eat grocery store, over ripe, starchy, who knows how many days it has been picked for corn. I robbed from mine my brother's corn field early in the morning with a little help from the girls.

Shuck and silk the corn and cut off any bad spots. Bring a huge pot of water to a boil. When you put your ears of corn in, it will stop boiling.

When it starts boiling again, it's time to take the ears out. Immediately put them in a large bowl or your sink filled with ice water to stop the cooking process. This was my last batch below, so just pretend like there is WAY more ice in there.

Line them up on a cookie sheet and put it in the freezer. It's ok to stack them on top of each other. I set mine down in the deep freezer as soon as I get the first batch done and just add to it as I go.

Leave them in there until the next morning so they get nice and frozen solid. Then, just throw them into freezer bags.

I use gallon bags so I don't have so many floating around getting lost in the freezer. And since they were frozen in layers, on the cookie sheet they won't be all stuck to gether in the bag and you can just pull out however many you need for each meal.

Sunday, May 30, 2010

Buttercream Frosting

After our scrumptious hamburgers for lunch today, the whole family decided we needed something sweet for an afternoon snack. We hadn't had cupcakes since Aly's birthday at school, so we all agreed on those.

I used a new frosting recipe this time and it is definately a keeper! I forgot that I was out of regular milk, which I use in my usual go to frosting recipe, so I substituted evaporated milk. I don't know if it was that substitution or if I just got the proportion of butter to shortening just right this time, but this is definately better than my usual frosting. Also, I don't usually (ok, so I never) sift my powdered sugar, but I did this time.


Buttercream Frosting
1 stick softened butter
2 tablespoons shortening
1 tablespoon vanilla
4 cups powdered sugar- sift after measuring
2 tablespoons evaporated milk


I use my paddle attachment on my Kitchen Aid stand mixer for this. I love that I can turn it on and just walk away. Beat the softened butter and shortening together for a few minutes to be sure they are well combined and creamy. Add the vanilla. Measure out 3 cups of powdered sugar into your sifter and sift that into your mixing bowl on top of the other ingredients and beat well. Add your evaporated milk, beat again. Add the remaining cup of sifted powdered sugar and just let that whip for a few minutes. Check to make sure the consistency is what you like. Mine was perfect but if it is too stiff, add a tiny splash of milk, if it is too thin, add a little more powdered sugar.


I love how pretty they are too. The girls said they looked like blue roses. I just used a Wilton 2D tip and piped it on really fast, not trying to make them look professional or anything. I am so much faster with piping than using a knife or offset spatula to frost cupcakes. And these are definately prettier.

Thursday, April 15, 2010

Finally the Cakes!

Yes, I'm still alive in case anyone was wondering. I have just been very busy so not a lot of time for crafting. I started back to school in January and have had to put crafting and blogging on the back burner. Family, school, and work are just more of a priority than blogging right now. I'm not taking classes this summer though so hopefully there will be more frequent posts soon.

I love how the Candyland cake turned out, but most importantly, Aly loved her cake. She had lots of input into the design.
It is decorated with Ribbon Candy, Candy Sticks, Twizzlers, Mike-and-Ike's, Almond Joy, Chocolate Chips, Dum Dums, and Peppermint. The colored squares for the path and edges of the cake are made from Marshmallow Fondant using the recipe posted HERE.

And here is Abby with her Orange and Purple Barbie. She even had to approve the shades of orange and purple to make sure they were ok before she would let me frost the cake. What can I say, the girl loves her Clemson Tigers; makes her Mama and Daddy proud!
I made the bodice of the dress with Marshmallow Fondant. So much easier and prettier than trying to make it out of regular frosting like I did Aly's barbie cake last year.

Saturday, January 30, 2010

Homemade Chocolate Syrup = YUM!


I decided to finally get around to making some homemade chocolate syrup today after Donna telling me she had found a recipe a couple of weeks ago. I found a couple of recipes that looked good and combined them. Because, well..... I just don't know when to leave well enough alone when it comes to cooking and baking or anything else for that matter.

Homemade Chocolate Syrup
½ cup cocoa powder
1 cup water
2 cups sugar
2 pinches salt
½ teaspoon vanilla
1 tbsp light corn syrup

Mix the sugar, salt, and the water in a saucepan. Bring to a boil and wisk in the cocoa. Continue to wisk and let it boil for 3 minutes over medium heat. Be careful not to let it boil over; almost learned that lesson the hard way myself. Remove from heat and let it cool about a minute before wisking in the vanilla. This way the vanilla won't burn off with the high temperature. Let it cool 10-15 minutes then pour into a glass jar or squeeze bottle, and store in the refrigerator. It will stay good for several months. Yields a little over two cups.

I think you could eliminate the light corn syrup if you wanted to and maybe just cook it a minute or so longer. I just happened to have some on hand already so I used it. I saw several recipes that didn't call for it though.

I think it tastes just as good if not better than Hershey's. Aly had a glass of chocolate milk after supper tonight and I am having some in a cup of coffee right now and we both agree it is delicious. And yes, I will be awake until midnight now drinking coffee this late. Thankfully I have plenty to keep me busy.

Saturday, January 2, 2010

Oatmeal Cookies

Oatmeal cookies are probably my favorite kind of cookie. Chocolate Chip runs a close second though. Actually, my Grandma's Oatmeal Raisin Sunflower Seed cookies are actually my favorite to eat, but they are harder to make so we don't have them as often. The girls were delighted when I told them we could make cookies for breakfast this morning. No, they aren't a healthy breakfast cookie, but I figure they can't be any worse than a poptart.

The original recipe from Mama. I think she got it from the box of Kroger brand oatmeal when we were kids. You can tell I have made these many times.

Kroger Oatmeal Cookies
2 cups shortening
2 cups sugar
2 cups brown sugar
4 eggs
2 teaspoons vanilla
3 cups flour
2 teaspoons baking soda
2 teaspoons salt
6 cups oatmeal
Cream shortening and sugars. Add eggs and vanilla. Stir in flour, salt, and baking soda. Stir in oatmeal. Drop by spoonfulls and bake at 350F for about 10 minutes.
This makes a LOT of cookies. Not sure exactly how many. I usually only make 1/2 batch. Of that I cook 1/2 right then, and the other 1/2 I go ahead and scoop out onto a cookie sheet. Then I put those in the freezer overnight so they are frozen solid. Then I put them in a gallon ziploc bag so I can pull them out and cook them as we want them. You can also freeze them already baked, but doing it unbaked lets you have fresh hot homemade oatmeal cookies without all the mess later.

I prefer to use a cookie scoop so that all my cookies turn out the same size and are nice and round. I can never seem to get them even when I use a spoon to scoop them out.

I stuck a few M&M's on a couple of them before I baked them. The girls liked them but I prefer the plain ones.

They will look like this when they are ready to come out of the oven. They should look slightly golden brown but still underbaked. This will make sure they have a crispy outside but a little soft and chewy inside.

Wednesday, December 23, 2009

Christmas Stocking Exchange

I did a Christmas Stocking Exchange with Donna at Mudpies and Memories.
Here are the rules we went by:
1. The stocking must be homemade and from items already in our sewing/crafting stashes.
2. No more than $5 can be spent
3. At least one item must be purchased from Goodwill (a frugalista favorite)
4. Must include at least 1 candy/food item (because we love to eat!)

Here are the things I put in Donna's gift:

Homemade Apple Muffin Mix

Seriously, how cute is this smiling spoon. I recieved a set of 6 for Christmas and just had to share one.
Banana Chips
Scrabble Tile Necklace and kit so she can make more. The tiles are from a game I found at Goodwill.
Bottlecap Pincushion. I actually went "dumpster diving" in our big garbage can outside to reclaim the apple juice lid for this one!
Scarf- knitted this one myself! I'm so proud I finished it in 24 hours during my hubby's Sunday and Monday football watching sessions.

1/2 yard of Coca Cola fabric from my stash used to wrap the gift. I was just NOT in the mood to make a stocking and this way it can be reused for something else.

Here it is all wrapped up and ready to give.

Wednesday, November 11, 2009

Oatmeal Raisin Apple Muffins


I did mostlly mini muffins so my regular size ones are kind of small b/c I barely had enough to fill the 6 ct. regular size tin. That is why this one is so short.

This is my all time favorite Muffin Recipe. I started with a recipe I found somewhere on the internet and altered it until it was just the way I like it.

Preheat the oven to 375 degrees and grease 12 muffin cups

1 cup all purpose flour
1/4 cup whole wheat flour
1 cup old-fashioned rolled oats
1/2 cup sugar
2 tsp. baking powder
1/2 tsp baking soda
1/2 tsp salt
1 tsp cinnamon
1 cup applesauce
1 egg
1/3 cup canola oil
1/3 cup milk
1/2 cup chopped nuts or sunflower seeds
1/2 cup raisins

Combine the first 7 dry ingredients in a medium bowl. Mix the applesauce, egg, oil and milk in another. Make a well in the middle of the dry ingredients and stir in the wet ones, mixing just until combined. Fold in the nuts and raisins, divide among the muffin cups. Bake at 375 for 18 to 20 minutes until the muffins are golden brown and smell heavenly.

Tuesday, November 3, 2009

Marshmallow Fondant

Just found a really great you tube video on how to make Marshmallow Fondant.  I will have to try making some of this in preparation for the next round of birthday cakes for the girls.  Or, maybe we can decorate some cupcakes for Thanksgiving or Christmas.

Tuesday, September 8, 2009

Oreo Balls

So, I walk into my kitchen today to put away some groceries. I see a ziploc bag sitting on the counter with some sort of white chocolate dipped ball in it along with a little strip of paper. Well, the paper had a picture and recipe on it for Oreo Balls. Now I have no clue where this thing came from, but it is chocolate sitting completely unattended on MY kitchen counter, so of course I ate it before anybody could tell me not to. It was so yummy! I just had to share the recipe because it was so simple.

Oreo Balls

1 package oreos
16 oz cream cheese
white chocolate to melt for dipping

Finely chop oreos. Soften cream cheese and mix together with oreos. Roll into balls and refrigerate until firm. Melt white chocolate and dip the balls to coat. Cool on wax paper and enjoy!

Thats it! So simple. I wish I had thought to take a picture of it before I ate the whole thing. Thought about it as I was eating the last bite, but it really wasn't much to look at. If you have seen one white chocolate ball, you have seen them all. Also, thank you to whoever gave this yummy little goodie to my husband. I am assuming it was either someone from work or someone from the public speaking class he is taking right now while trying to finish up his degree.

Sunday, August 30, 2009

Mama's Pound Cake

The cake is still in the oven, but I wanted to post the recipe before I lose it again and have to call mama again to get it.

2 sticks butter
1 cup shortening
3 cups sugar
6 eggs
1 tbsp vanilla
1 cup milk
3 1/2 cups all purpose flour
1/2 cup self rising flour

Pre-heat oven to 300 F. Cream the butter, shortening, and sugar. Add eggs one at a time and vanilla and beat well. Finally, you will add the flour and milk. Start with a little of your flour and then a little bit of milk. Alternate until everything is incorporated, but make sure you start and finish with the flour. Bake for 2 hours in a greased and floured bundt pan.

Friday, August 21, 2009

Goldfishy Chex Mix


With all the coupons and crazy grocery shopping I do, we always end up with an abundance of cereal. I made this version of chex mix today. Just looking for something a little different for an after school snack for the girls. I thought it could use a little more flavor, but the girls both loved it just how it was.

3 tablespoons margerine
4 1/2 cups Corn Chex cereal
1 cup Golfish crackers
1 1/2 cups pretzel sticks
1/2 pkg. ranch dip mix (powdered kind- standard 1 oz size)
1/4 cup grated parmesan cheese (kind in the canister)

Heat oven to 250 F. Melt margerine in the oven in a 13 x 9 inch pan. Stir in cereal, goldfish, and pretzels so they are evenly coated. Sprinkle the ranch dip mix and grated parmesan cheese over the top and toss to coat. Cook for approximately 15 minutes stirring every 5 minutes. Enjoy!

Wednesday, August 19, 2009

Chicken Caserole

I don't fix this for supper very often, but when I do, everybody seems to really like it. I usually make it without the peas and just serve them on the side, but decided to try something different this time.


1 can peas (15 oz drained)

1 can cream of mushroom soup (10.5 oz can- substitute any flavor you like)

2 cups cooked chopped chicken

2 cups dry rotini pasta (cooked and drained)

1/4 cup milk

salt and pepper to taste

6-8 oz shredded cheddar cheese


First, cook and drain your pasta. I used Rotini, just b/c that is what I had in the cabinet already. While pasta is cooking, combine chicken, cream of mushroom soup, peas, milk, and salt and pepper in a 2 quart casserole dish. Stir just to get it all mixed together, you don't want to mash the peas up too much. Add pasta to the casserole dish and stir it all up, then smooth out the top. Top with shredded cheese. Bake in 350 F oven for 20-30 minutes until the cheese is melted and bubbly.